segunda-feira, 16 de julho de 2012

Dica: P.S. I made this


Olá Hobbits! Hoje vim mostrar um site muito legal que descobri por um blog que costumo seguir. Ele se chama P.S I made this vejam:


É muito legal, tem vários tutoriais para incrementar suas roupas e fazer acessórios vejam alguns deles:

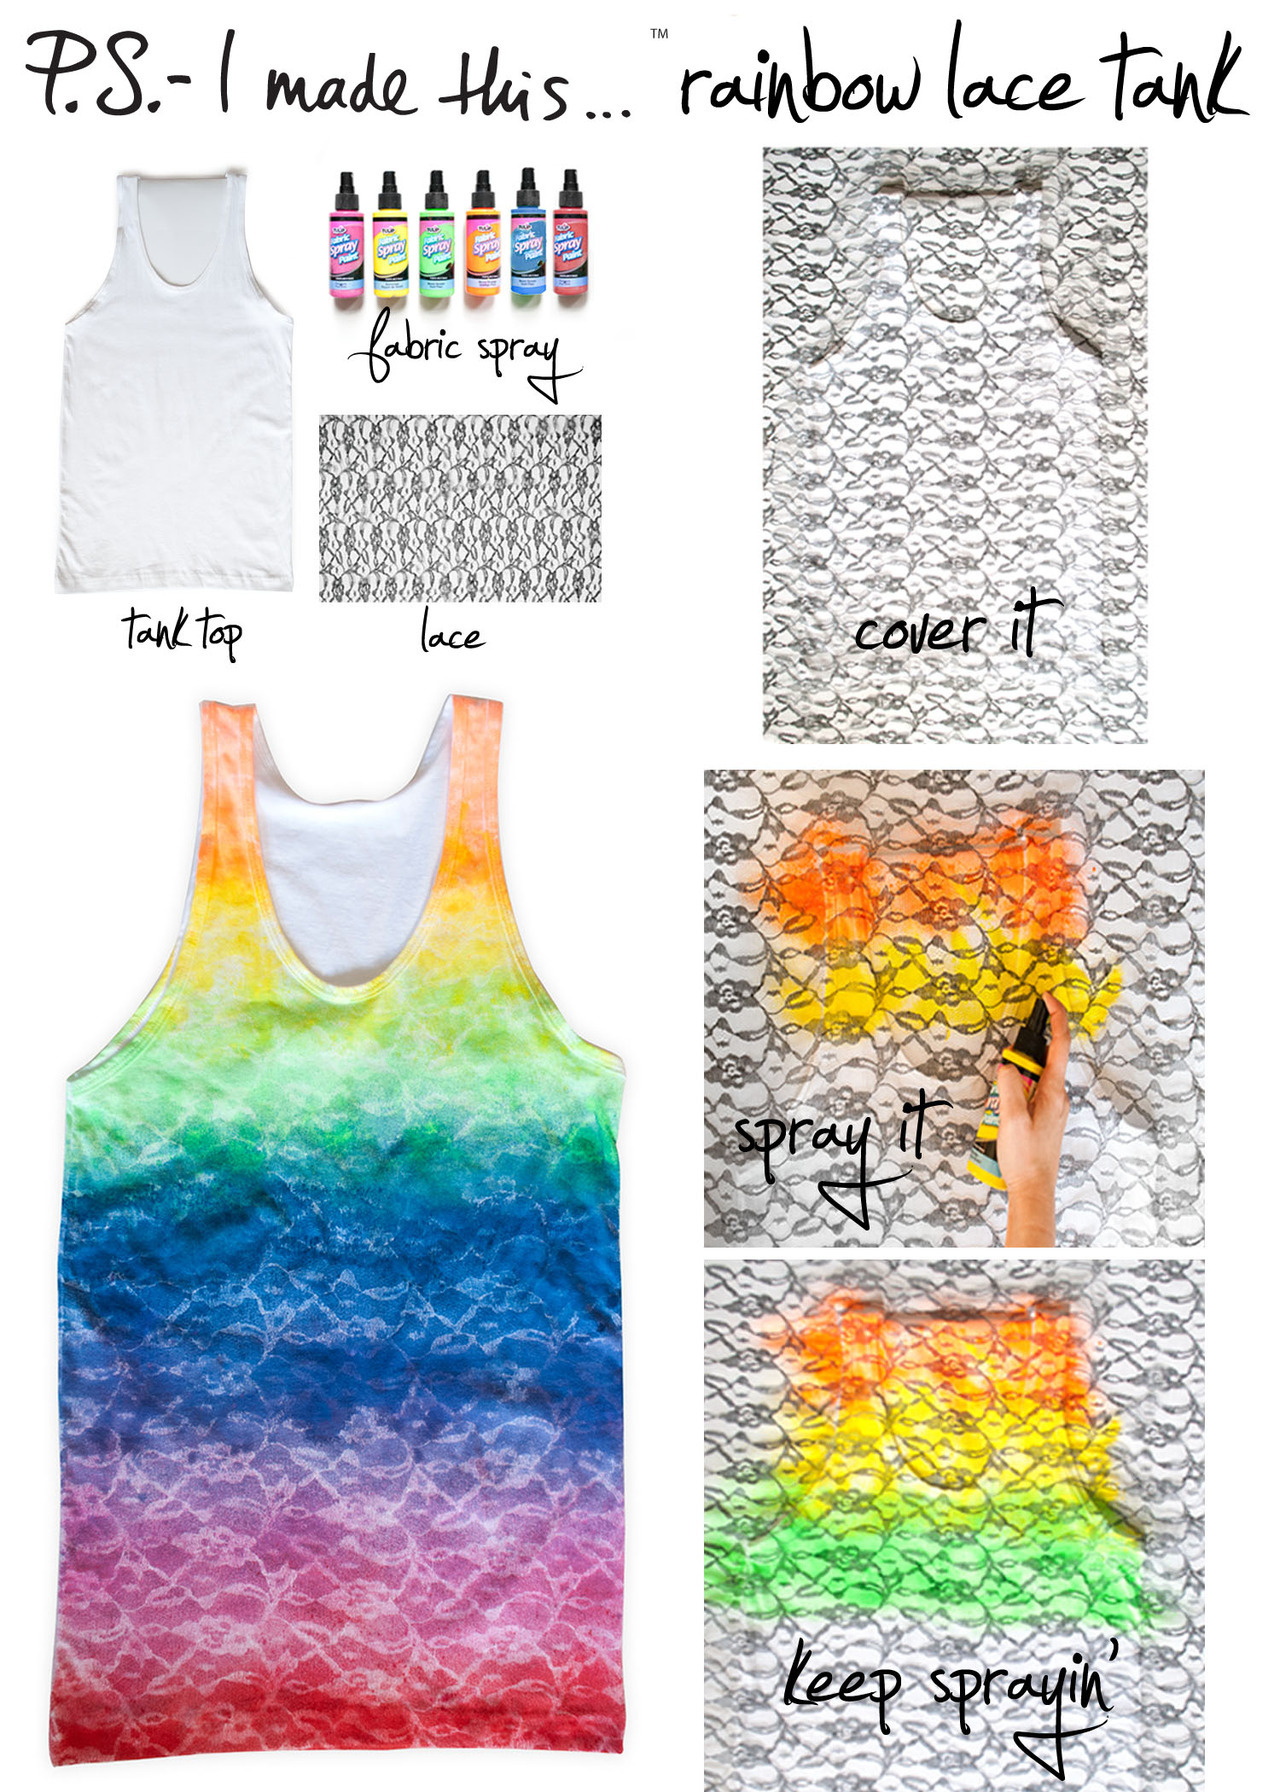
Make your technicolor dreams come true with a DIY that takes the delicate simplicity of lace to a bold and vibrant place. The pretty prisms of Christopher Kane’s Resort 2012 collection prove that going full spectrum can literally be like wearing a good mood…so get a taste of the rainbow by creating this chic tinted tank!    

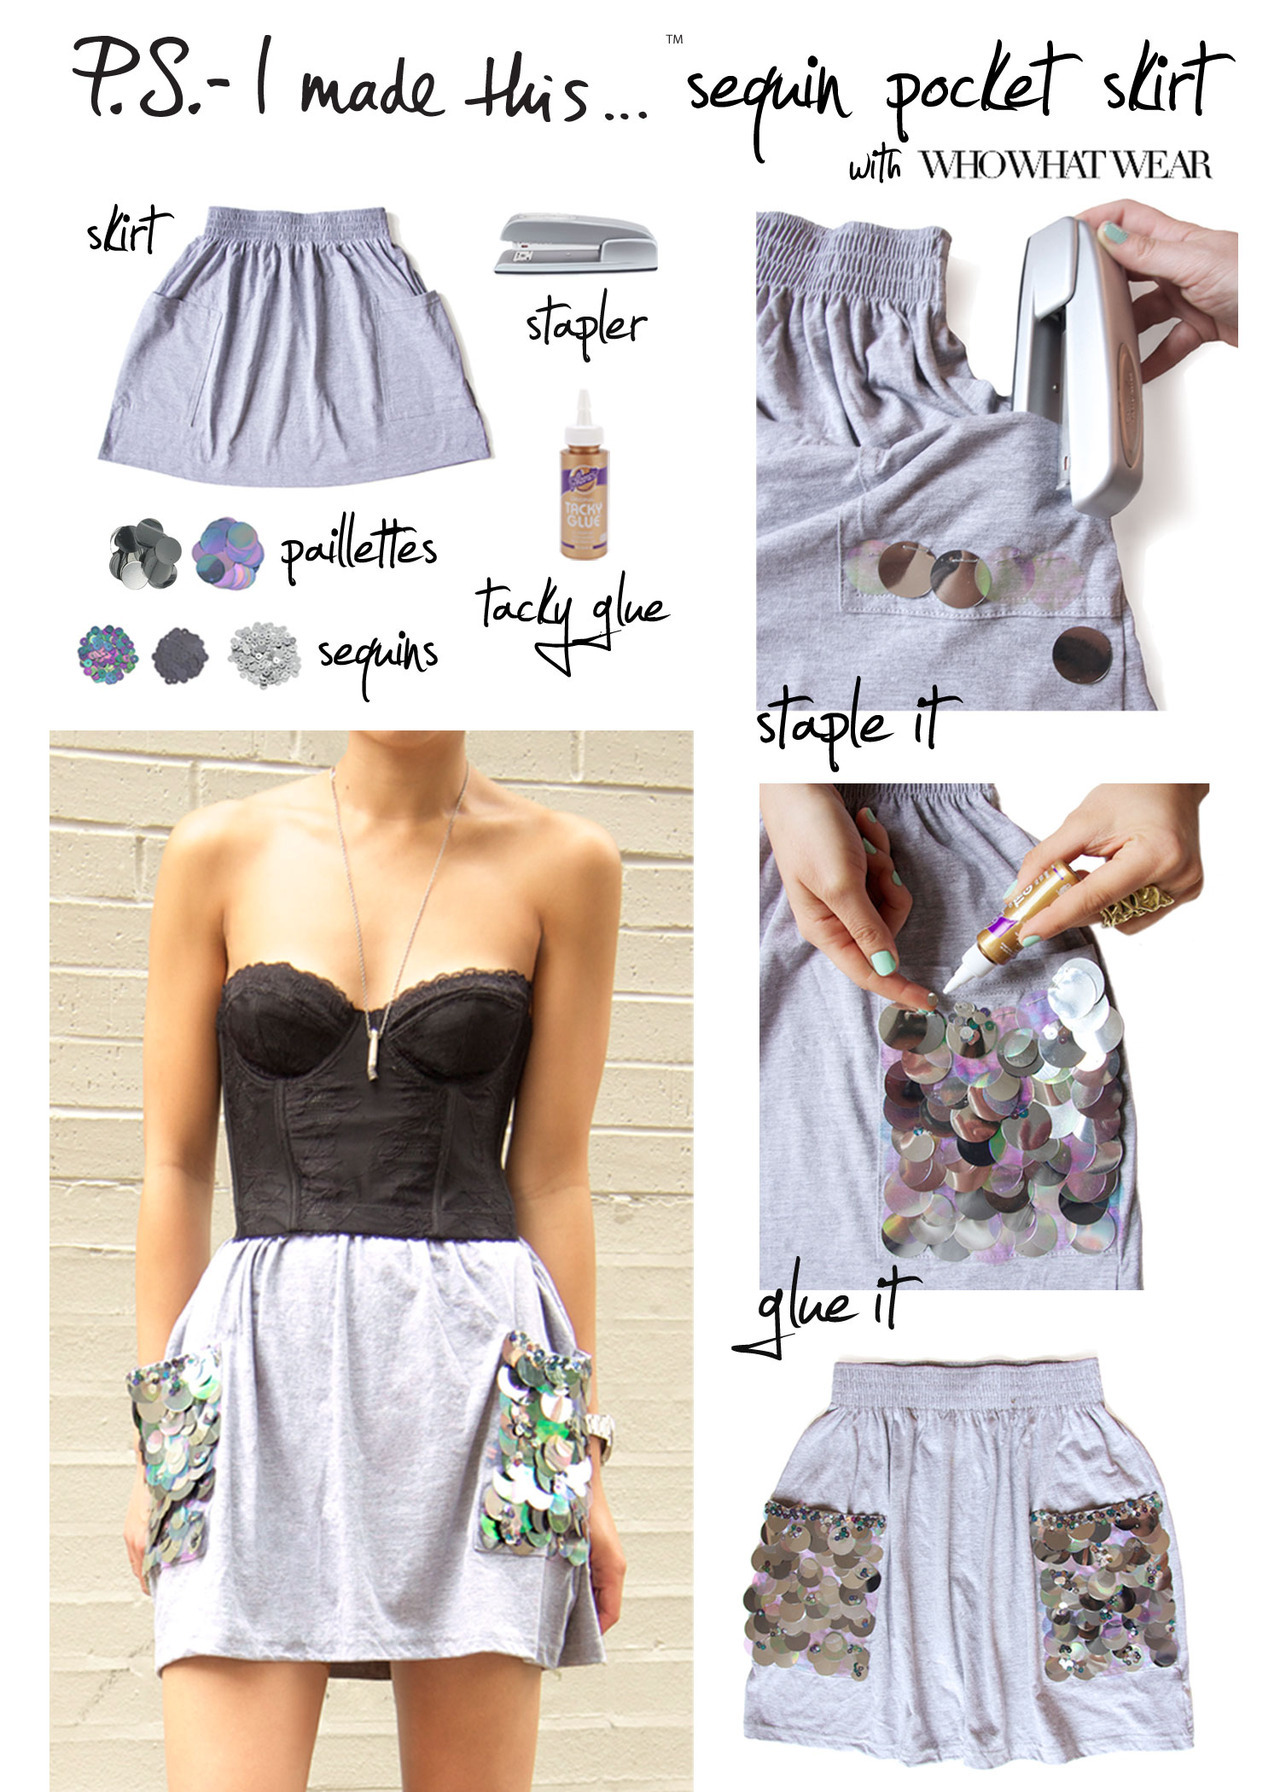
To create:  Use a solid white tank as the canvas.  Find lace  that has a pattern you love- there are thousands of different options to discover! You will need about 1 yard total and can re-use the lace as a stencil once dry.  Place the lace over the tank, using a colorful fabric spray  to create a “stripe” across the top of the tee.  P.S.- be sure to cover the surface underneath with newspaper so the surface will not get sprayed.  Continue to spray the remainder of the tank, alternating colors and slightly overlapping them to give the colors a seamless and beautiful rainbow effect.  Summer is in full swing and we’re swooning over all things sun and sea. Some of fashion’s most beautiful patterns and palettes often take inspiration from Mother Nature, and while the slinky silk Prada halter Gwyneth Paltrow wore to the Met Ball left most murmuring about how revealing it was, its shimmering macro-paillette pockets left us swimming in aquatic visions of mermaids & buried treasures.  Our friends over at Who What Wear agreed so we then created this unsinkable DIY. 
To create, start with larger paillettes and use a stapler to secure to skirt pocket by stapling at the top of the circle.  Mix colors and overlap as you go.  Once entire pocket is covered with the larger piallettes, cluster the smaller sequins together and add glue to cover any showing staples.  P.S- Feel free to use a needle and thread to add some stitches for extra reinforcement, after glue is dry.

Muito legal né? O ruim é que está tudo inglês, mas isso é o de menos.

Para visitar clique aqui. Não deixem de conferir.

XOXO julinha

Nenhum comentário:

Postar um comentário

:a   :b   :c   :d   :e   :f   :g   :h   :i   :j   :k   :l   :m   :n   :o   :p   :q   :r   :s   :t   :u   :v   :x   :y   :z